To notify the SEC that you will be unable to meet a filing deadline, you must file a Form 12b-25. This form contains information about the registrant and the reason why the filing will be late. This article covers how to create the EDGAR submission file and how to attach the primary document to the submission. Other articles in this category discuss tools to create the document, edit data, and perform other actions on the filing.
Form 12b-25 is a document that will be submitted as part of an “NT” filing. On GoFiler Online, you can use this form document for the following submissions: NT-NCEN, NT-NCSR, NT-NSAR, NT 10-D, NT 10-K, NT 10-Q, NT 15D2, NT 11-K and NT 20-F.
The 12b-25 document can be created in GoFiler Online using a form template, which will help save time. This document can be submitted as HTML or text. Using the form template will result in an HTML document that you can attach to your filing. See the article on how to create a document for a 12b-25 extension for more information on using the form template. There is also a text template and a plain HTML template that you can use to create your document. These templates are more flexible and will allow you to make changes to the style and text that appears on the template but will require editing in the Page View or Text View edit window of the software. (Page View is the window that allows you to edit rendered HTML code.)
To file a notification for a late filing:
- Open the EDGAR HTML Forms software from the portal.
- Click New > Project/Submission. (Note that if you use the New dialog instead of the New menu, you would select the Project/Submission (GFP/XML/EIS) option from the dialog.)
- Select the desired form type from the Form list.
- Enter your form data and save the project using the Save or Save As function.
If you have previously created a 12b-25 document, follow the next steps to complete your filing. If you haven't yet made a document, see the article on how to create a document for a 12b-25 extension.
- Click Submission > Add Files.

- In the navigation pane, click the folder, drive or removable media that contains the file you want to attach.
- Click the file, and then click Open.
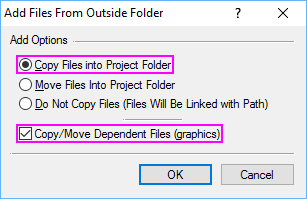
- Choose the Copy Files into Project Folder option. This will move your document into the same folder as your submission. If your document is already in the same folder as your submission, this dialog will not appear.

- Click OK.
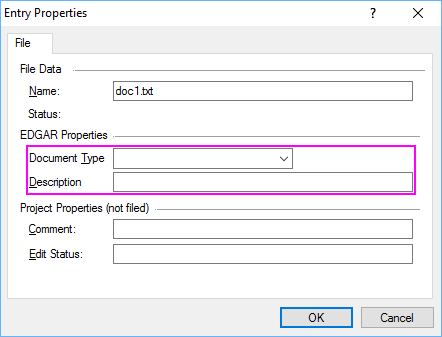
- Set the Document Type and Description under EDGAR Properties.

NOTE: The boxes under Project Properties are optional for use in workflow management. Data entered into those boxes will not be filed to EDGAR. Data entered in the Document Type and Description boxes will be filed to EDGAR. - Click OK.
- Save your submission using the Save.
Now, you can proof your submission or validate it. You can then file it as a TEST or LIVE filing by following the steps below:
- Save all of the documents and the project file for the submission.
- Make sure you have closed the documents for your submission and that no one else has any of your document open in another client or workstation. You should have only your project file open on your workspace.
- Click Submission > File > File Test to submit a TEST filing to EDGAR. Follow the instructions to submit the TEST filing.
- After checking your accession notice to verify that your filing is EDGAR compliant, click Submission > File > File Live to submit a LIVE filing to EDGAR. Follow the instructions to submit the LIVE filing.
Helpful Hints:
- The 12b-25 Extension Assistant can help you create a new submission more quickly. This tool will create the project and the primary document for your submission at the same time.
- You can attach additional exhibits to the filing if necessary using the standard method for adding documents to a submission.


