Multiple CIK or filer entries can be added to the library from a Comma-Separated Values (or CSV) file. CSV files are a common method of importing and exporting data from databases or spreadsheets. If you currently store CIK information in a spreadsheet like an Excel sheet, you can save the sheet as a CSV inside of Excel and use that new CSV file as your import file. If you store CIK information in an internal database, you may need to check with your software provider to see if you can export the data as CSV.
Before importing your data, you will need to make sure the file has a header row. The header row must contain certain keywords for each column to help the import process correctly identify data. You can use the names of each field in the CIK Library as the headers for their respective columns. You can view a complete list of header keywords in the article Importing Using the CIK Library Keywords and download a sample file here.
To Import CIK Information from CSV:
-
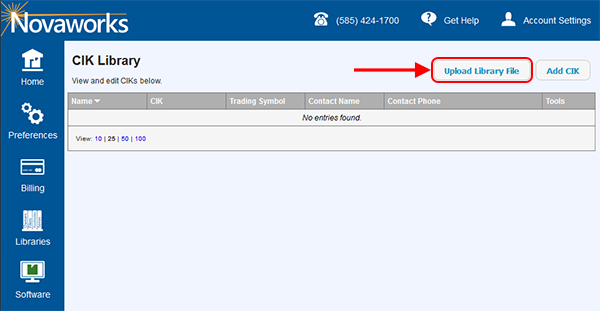
Click on the Upload Library File button located in the top right corner of the CIK Library page, as shown below:
-
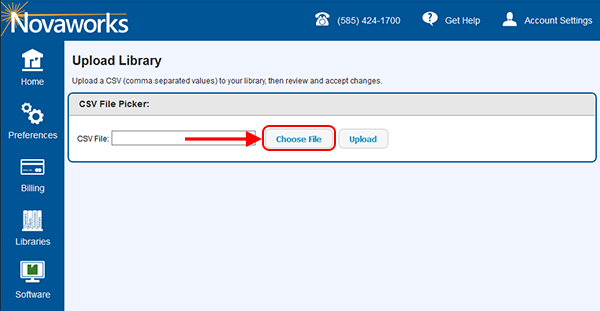
The Upload Library page appears. Click the Choose File button located in the CSV File Picker area, as shown below:
-
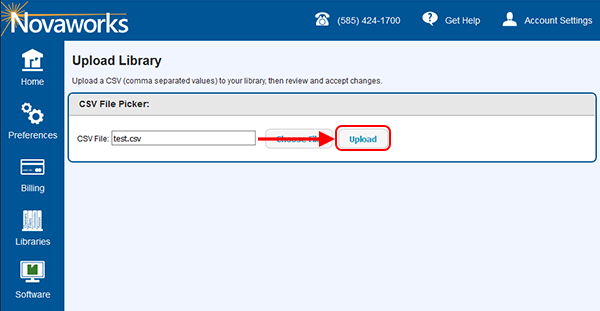
Navigate to and choose the CSV file to be imported. Press the Open button.
-
Click the Upload button, as shown below:
-
Depending on the size of the file being imported and the speed of your internet connection, this process may take up to five minutes. During this time, you will see a notice informing you that the operation is underway. After the process is complete, a notice will appear that says the upload is finished. Press the OK button.
-
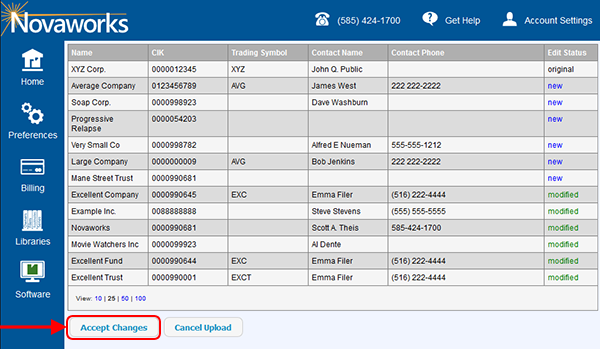
You will see the Upload Library page reload with new information. The Upload Log will displays the CIK and name of each entry that was uploaded and the result for that entry. The list of entries will show each entry in the library. Entries that are new will show "new" in the Edit Status column. Entries that have been changed due to the upload will show "modified" in the Edit Status column. Entries that were not changed by the upload will show "original" in the Edit Status column. Review the new library.
-
Click the Accept Changes button at the bottom of the page, as shown below:
-
A notice will appear, informing you that the library has been updated with the new entries. Click the OK button to return to the library.


Helpful Hints:
- A maximum of 1,000 entries may be imported from a single file. If you have more than 1,000 entries to import, break your list into multiple files and import each section individually.
